

Create first listener
A worked tutorial that builds an event listener, fires it from the Composer and checks that it ran.
Platform v0.x
Overview
This tutorial will guide you in creating event listeners and learning about the different triggers and actions.
Event listeners enable us to detect specific events that align with predefined criteria, known as triggers. These triggers can be configured via the mintBlue Console to respond to either internal events within the mintBlue ecosystem or real-time transactions occurring on the public audit layer. When an event triggers, you can define actions, which are predefined responses to tell mintBlue what to do.
Use Cases
To give some examples, you can set up an event listener to:
- Real-time notifications: A user receives a notification when a transaction involving their account occurs, such as an incoming payment or token transfer.
- Automated workflows: Send an email when a transaction is received on a specific address.
- Data synchronisation: Keep application data in sync with changes recorded on the audit layer.
- Compliance and Reporting: Track transactions for regulatory compliance and reporting.
Prerequisites
- ✅ Create an SDK Access Token (see Quickstart)
- ✅ Create two new projects called
Data provenanceandCopy data provenance. Don't forget to copy your project IDs.
Step 1: Create a new event listener
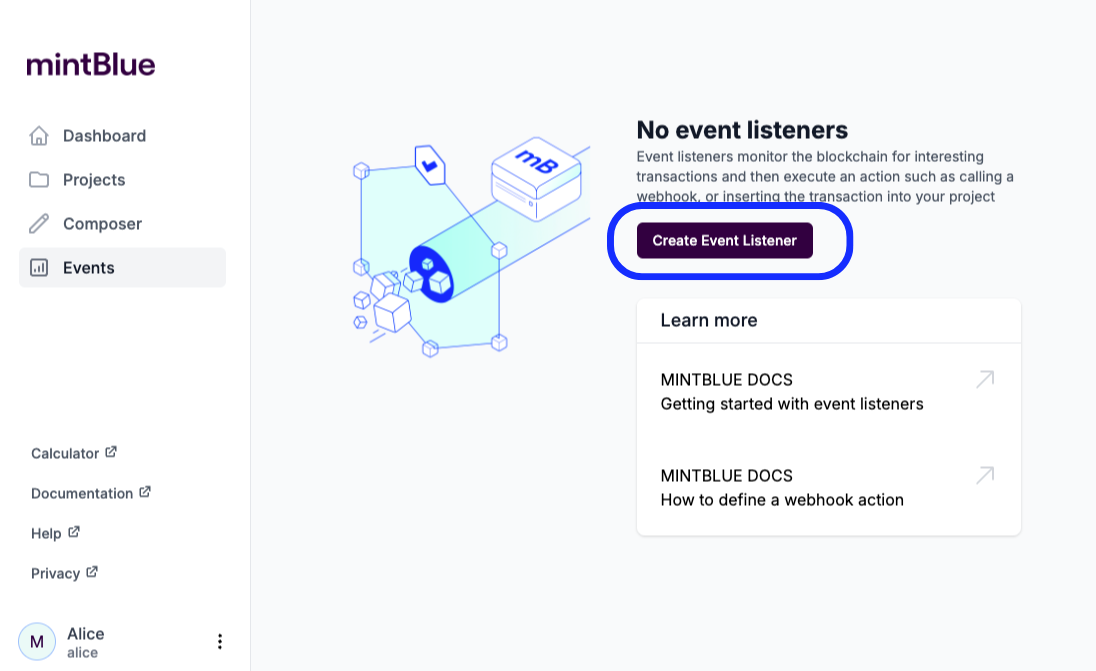
To begin, create a new event listener by clicking on the "Create Event Listener" button.
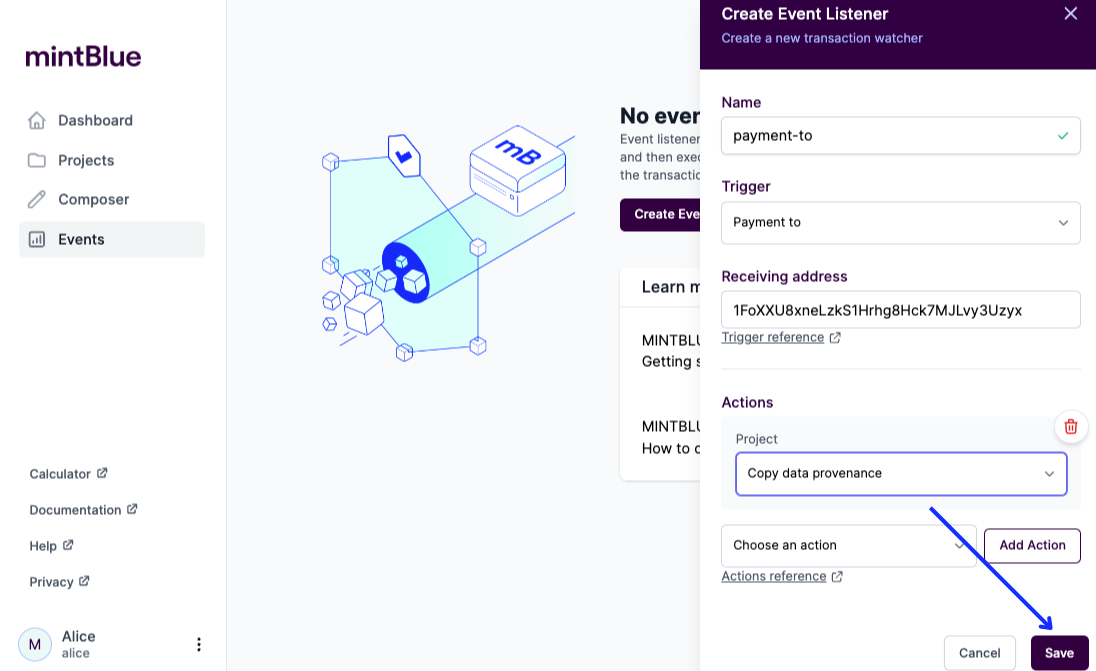
In our example, we'll set up an event listener to trigger for each payment transaction sent to the address 12c6DSiU4Rq3P4ZxziKxzrL5LmMBrzjrJX. This address should be added to the Trigger Options field.
When this event is triggered, we want to insert this transaction into a project called Copy data provenance as we want to create a copy of each transaction into a different project. You can define multiple actions, but let's only define the Insert into project action for now.
After entering the event details, click Save.
Step 2: Test the event listener
We can test the event listener by sending a transaction from the mintBlue Composer.
First, select a project from which you want to send a transaction. In this example, we are sending a transaction from the Data provenance project.
Let's send a payment transaction by clicking the "Payment" option. You need to provide the address 12c6DSiU4Rq3P4ZxziKxzrL5LmMBrzjrJX and the number of Satoshis. You can set it to 1.
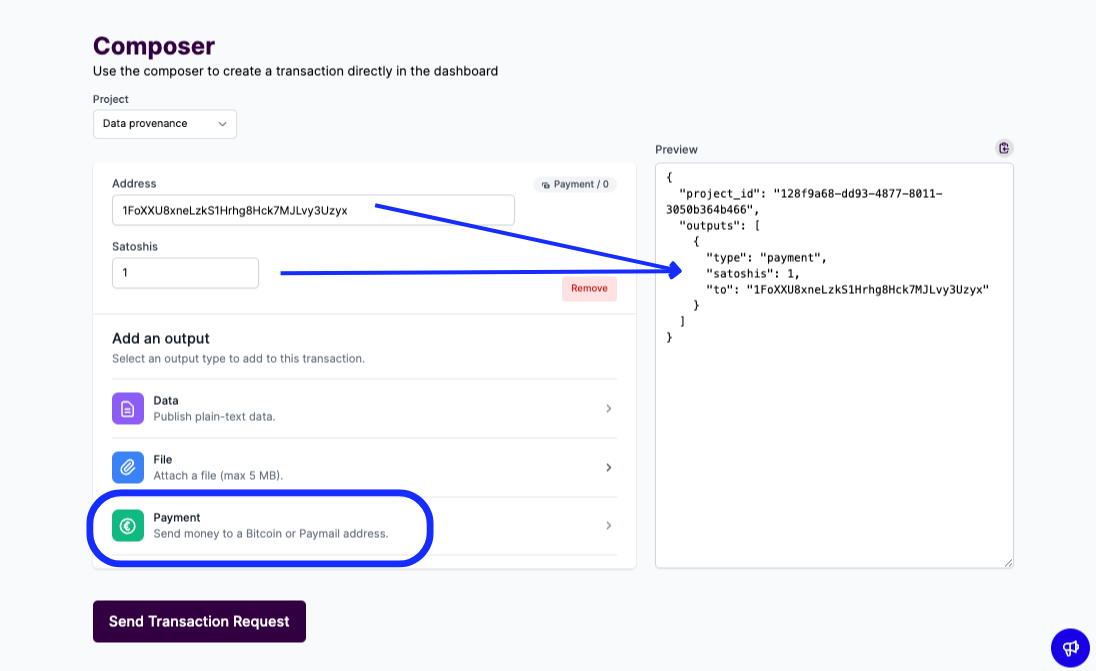
Make sure to click the "Send Transaction Request" button.
Step 3: Verify if the event has triggered
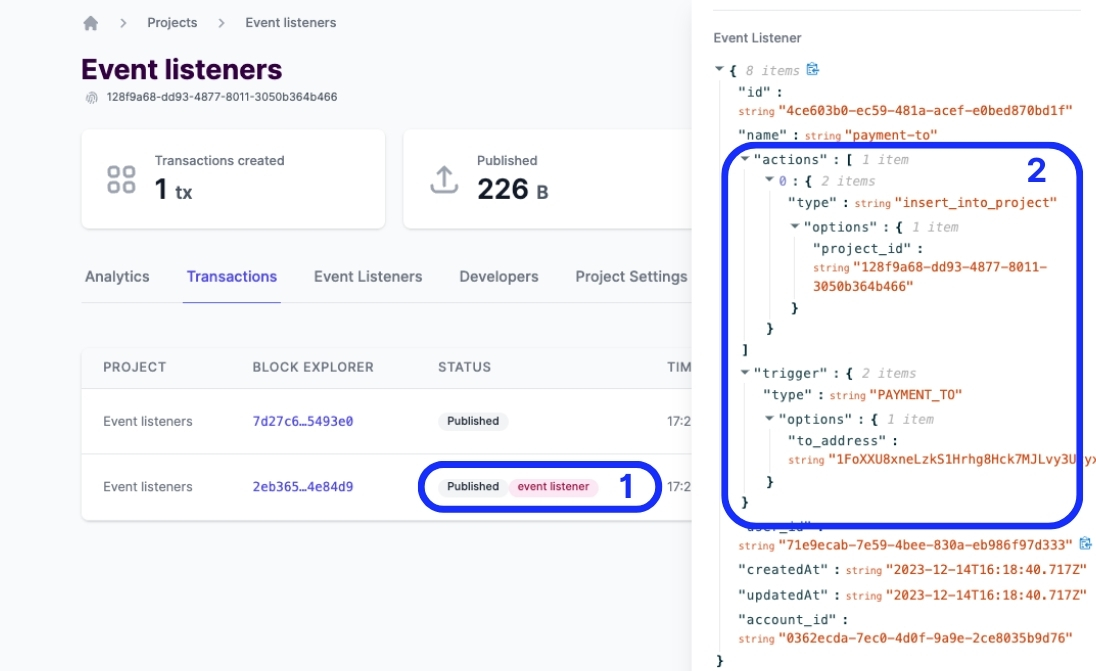
Finally, let's verify if the event has been triggered by going to our project's transactions tab. In our example, we should see two transactions:
- Payment transaction we've sent via the mintBlue Composer.
- Same payment transaction inserted by the event listener.
In the image below, you can see two transactions. The second transaction has the pink event listener tag (1). If you open the transaction with the event listener tag, you'll see that it has an actions and trigger key (2) in the JSON object.
Summary
In this tutorial, you've learned to create a trigger and action, and how to verify them. For further details on the different triggers and actions available, you can read the reference documentation for Triggers and Actions.